
My blog, like a lot of JAMstack content, is written in Markdown. I’ve written about how I’ve used MDX as a parser to give my Markdown extra power. I’ve also written a bit about some of the shortcomings I’ve had trying to replicate the same MDX functionality in MDsveX. One thing that MDX and MDsveX have in common is that they are both built on top of the remark and rehype packages from the unified ecosystem. Both parsers use these dependencies and they each have the ability to use any plugin that would work with the raw remark or rehype processors. To make my workflow less coupled to a specific technology, I decided to move the transformations up a level of abstraction. Instead of using MDX I wrote a series of plugins to transform my markdown.
How do Markdown Parsers Work?
Markdown parsers work by taking a file, running it through a series of transformers, and then producing HTML for the browser. The transformation steps involve turning documents into a common shape that different tools can read and interpret, called an abstract syntax tree. Put shortly —
Abstract syntax trees are data structures widely used in compilers to represent the structure of program code. An AST is usually the result of the syntax analysis phase of a compiler. It often serves as an intermediate representation of the program through several stages that the compiler requires, and has a strong impact on the final output of the compiler.
Wikipedia
# Luminous beings are we, not this crude matter.{
type: "heading",
depth: 1,
children: [
{
type: "text",
value: "Luminous beings are we, not this crude matter."
}
]
}<h1>Luminous beings are we, not this crude matter.</h1>It isn’t necessary to understand the computer science behind an abstract syntax tree (AST) to work with plugins. All you need to know is that an AST is an intermediary step that a compiler takes between taking in a .md and outputting an .html file. To paraphrase heavily from the mdsvex docs, the source file is first parsed into a Markdown AST (MDAST), where remark plugins run. Then the data is converted into an HTML AST (HAST), where rehype plugins run. Finally the data is converted (stringified) into valid markup for the browser.
What is Remark?
- remark is a unified processor to parse and serialize Markdown.
- API by unified
- Parses Markdown to a syntax tree with
remark-parse - mdast syntax tree
- Plugins transform the tree
- Serializes syntax trees to Markdown with
remark-stringify
What is Rehype?
- rehype is a unified processor to parse and serialize HTML
- API by unified
- Parses HTML to the tree with
rehype-parse - hast syntax tree
- Plugins transform the tree
- Serializes the tree to HTML with
rehype-stringify
When to use Each?
I couldn’t find a hard and fast rule for when to use remark and when to use rehype. There are ways to get the same end result with either tool. My rule of thumb for this project had to do with the original format of the content I was manipulating. If the plugin would run on markdown syntax I used remark. If the plugin was running on any HTML used directly in the document, I used rehype. In either scenario the transformation is done by manipulating values in the syntax tree, so the process isn’t too different.
Manipulating the AST
This CSS-Tricks article by Jason Lengstorf goes into deep detail about how ASTs work and best practices for editing them. Here are a few key points I wanted to highlight.
- ASTs are the best way to make programmatic changes to HTML. HTML is hard (maybe even impossible) to parse with RegEx, so trying to change it without using an AST is often error prone.
- Contrary to usual best practices, ASTs should be treated as mutable. Because AST documents can be very large, making copies of the data and making changes to those copies can be detrimental to performance. Manipulations are best made directly to the original AST.
- AST transformations work recursively, so if new nodes are added the transformer will find them and try to transform them too. This is important to be aware of to avoid accidental infinitely deep loops.
Basic Plugin Structure
A plugin works by creating a JavaScript function that returns a transformer method. That transformer will be run on each node that is found by the unist-util-visit package’s visit method. The plugin will be called by the unified process and will be passed the AST tree. There are many ways to directly mutate the tree, but I found the easiest was to use Object.assign to overwrite the existing tree nodes with new values.
import visit from 'unist-util-visit'

function transformer(ast) {
  visit(ast, 'TYPE', visitor)

  function visitor(node) {
    newNode = 'do work here'
    return Object.assign(node, newNode)
  }
}

function plugin() {
  return transformer
}

export default plugin
The second argument for the visit method is a node type that the transformation will be applied to. The unist ecosystem comes with a predefined list of literal types, but plugins can define their own custom ones. I found that copy / pasting HTML into this AST Explorer tool was a super helpful way to find the exact string that each node type matched against. For HTML elements that don’t have an explicit type, visit can find raw nodes and then match them with RegEx. If, like me, you’re not that great at RegEx, I found a RegeEx testing tool to be invaluable while I was working.
Reworking Attributes on an Existing Element
It is a controversial opinion, but I prefer to use target='_blank' on links external to my site. I cite a lot of sources via links, and I don’t want readers to lose their place on my page after clicking on an external resource. There are two things this plugin needs to do — apply the correct target attribute, but more importantly it needs to add some other attributes to fix a security concern. One nice thing about adding these with a plugin is that I do not have to write these extra attributes manually on every link. Also if I ever change my opinion on where links should open I can remove them all at once by editing the plugin.
The original AST tree for a link node looks roughly like this:
{
  type: 'link',
  title: 'string,
  url: 'string',
  children: [
    {
      type: 'text',
      value: 'string',
    }
  ],
}
In short, this plugin visits link nodes and uses RegEx to determine if they linked to external sites, then if it does, assign some extra hProperties to the node. Nodes of different types come with different default data values (for instance, a link node has a data.url value), and hProperties are sort of a catchall for all other attributes.
function transformer(ast) {
  visit(ast, 'link', visitor)

  function visitor(node) {
    const data = node.data || (node.data = {})
    const props = data.hProperties || (data.hProperties = {})
    const url = node.url


    if(url.includes(siteUrl)) {
      return
    } else {
      props.target = '_blank'
      props.rel = 'noopener'
      return
    }
  }
}

function links() {
  return transformer
}

export default links
The transformer function will look at all links, determine if their data.url contains the url of the current site, and assign data.hProperties of target = '_blank' and rel = 'noopener' to links that do not. Again, these values need to mutate the tree directly, so that’s why the new values are set on the original node rather than creating a copy.
[an intneral link](https://www.ryanfiller.com/about)
[an external link](https://developer.mozilla.org)<a href="https://www.ryanfiller.com/about">
an intneral link
</a>
<a target="_blank" rel="noopener" href="https://developer.mozilla.org">
an external link
</a>See the full code for the plugin on GitHub.
Inserting New Child Elements
This plugin reads any heading element and automatically converts it to a linkable hash. It also creates an <a> tag that a user can click to easily copy the hash out of the url bar.
The original AST tree for a heading node looks roughly like this:
{
  type: 'heading',
  depth: number,
  children: [
    {
      type: 'text',
      value: 'string'
    }
  ]
}
This plugin needs to take the original text children of the element and convert it into a url hash. Then it replaces the original child elements with a new anchor tag that contains both the original text and the hashed text. To handle some edge cases this plugin uses another plugin, remark-stringify, to convert the entire element into one string. This will catch scenarios where headings contain bold or italic text without accidentally stringifying a <strong> or <em> tag.
function transformer(ast) {
  visit(ast, 'heading', visitor)

  function visitor(node) {
    const data = node.data || (node.data = {})
    const props = data.hProperties || (data.hProperties = {})
    const slugId = slugify(toString(node))

    data.id = slugId
    props.id = slugId

    const originalChildren = [...node.children]

    node.children = [{
      type: 'link',
      url: `#${slugId}`,
      children: originalChildren
    }]
  }
}

function headings() {
  return transformer
}

export default headings
In order to wrap the original text element, the …spread operator can be used to create a new array filled with the data from the original heading. Then a new children array that contains a single link type node can be assigned to the heading. The new link node will have all the elements of the original heading.
### It was a dark and stormy night.<h3 id="it-was-a-dark-and-stormy-night">
<a href="#it-was-a-dark-and-stormy-night">
It was a dark and stormy night.
</a>
</h3>See the full code for the plugin on GitHub.
Wrapping an Element with a New Element
In a previous post I explained how I was using Netlify LFS to host and resize images using url parameters. This is something I wanted to automate using remark. I also wanted to augment the native Markdown image syntax using the remark-attr plugin to pass a data-caption attribute. If this attribute exists I want to take that element and wrap it in a <figure> tag with the caption inside of a <figcaption>.
The original AST tree for a image node looks roughly like this:
{
  type: 'image',
  url: 'string',
  alt: 'string',
  data: {
    hProperties: {
      data-caption: 'string'
    }
  }
}
The most important part of this transformation is to mutate the children array in a way that doesn’t cause an infinite loop. Since the visit function will work recursively, if the number of children changes then the new nodes will also be visited. If a transformer creates a node that can itself be transformed, this will go on forever and crash the build process.
function transformer(ast) {
  visit(ast, 'image', visitor)

  function visitor(node) {
    const data = node.data || (node.data = {})
    const props = data.hProperties || (data.hProperties = {})
    let src = node.url
    const alt = node.alt
    const caption = props['data-caption']

    const skipSrcSet = ['.gif', '.svg'].some(ext => src.includes(ext))

    if (!skipSrcSet) {
      src = `srcset="${src}?nf_resize=fit&w=500 500w, ${src}?nf_resize=fit&w=800 800w"
        sizes="100vw"
        src="${src}?nf_resize=fit&w=1000"
      `
    }

    let newNode = null
    if (caption) {
      newNode = {
        type: 'html',
        value: `<figure>
          <img src=${src} alt="${alt}" />
          <figcaption>${caption}</figcaption>
        </figure>`
      }
    } else {
      newNode = {
        type: 'html',
        value: `<img src=${src} alt="${alt}" />`
      }
    }

    Object.assign(node, newNode)
  }
}

function images() {
  return transformer
}

export default images
Since Netlify Large media will only offer transforms for certain types of images I created an array of extensions that I wanted my function to ignore. If the file type wasn’t a .gif or a .svg, I would apply a series of query parameters to get back resized images. To decide between creating a <figure> or an <img> an if() statement checks whether the node contains hProperties['data-caption]. In either scenario, a new node is created with type html and a value is passed with a string literal for what will be rendered in the DOM.
In order to keep this plugin from infinitely creating and visiting new image type nodes is to used Object.assign to overwrite the current node and never create new ones. By doing this we preserve the original index in the AST tree and the transformer will understand that it’s already seen this node and not visit it again.

{data-caption='a caption'}<img
alt="alt text"
src="/images/picture.jpg?nf_resize=fit&w=1000"
srcset="/images/picture.jpg?nf_resize=fit&w=500 500w,
/images/picture.jpg?nf_resize=fit&w=800 800w"
sizes="100vw"
/>
<figure>
<img
alt="alt text"
src="/images/picture.jpg?nf_resize=fit&w=1000"
srcset="/images/picture.jpg?nf_resize=fit&w=500 500w,
/images/picture.jpg?nf_resize=fit&w=800 800w"
sizes="100vw"
/>
<figcaption>
a caption
</figcaption>
</figure>
See the full code for the plugin on GitHub.
Hijacking Existing Syntax to Create New Markup
Markdown supports shorthand for a limited number of elements, and to the best of my knowledge no more are being added. For elements with no shorthand you can always use HTML directly in a .md file. For some elements this can be very verbose. Wouldn’t it be nice to steal some of the concise syntax for, say, an image but use it instead for a video file?

Since linking to a video with the image syntax doesn’t create a working element, remark can change the markup to work for video. Be very careful with this idea and make sure you’re not overwriting any valid usecases. I think I’m fine in this scenario since pointing an <img> tag to a video file will always result in a broken image. Inside the image transformer, the function can check the file type of the src attribute and return a new Object.assign with completely different markup depending on the extension.
function transformer(ast) {
  visit(ast, 'image', visitor)

  function visitor(node) {
    const data = node.data || (node.data = {})
    let src = node.url
    const alt = node.alt

    // escape hatch into video component
    if(node.url.includes('.mp4')) {
      const video = {
        type: 'html',
        value: `
        <video title="${alt}" controls loop autoplay>
          <source src="${src}" type="video/mp4" muted />
          Sorry, your browser doesn't support embedded videos.
          <track kind="descriptions" label="${alt}" />
        </video>`
      }
      return Object.assign(node, video)
    }

    // else, original image transformation
    ...
  }
}

function images() {
  return transformer
}

export default images<video title="alt text" controls loop autoplay>
<source src="/videos/video.mp4" type="video/mp4" muted />
Sorry, your browser doesn't support embedded videos.
<track kind="descriptions" label="alt text" />
</video>See the full code for the plugin on GitHub.
Transforming HTML
So far all of the examples I’ve covered have taken in markdown content and looked at the MDAST tree to make changes. rehype plugins will look at HTML content in the HAST tree and work almost exactly the same as remark MDAST plugins. Nodes can have different types than the MDAST tree, but all of the same rules apply.
Even though rendering an <iframe> in Markdown requires using the full HTML syntax, I still want to be as terse as possible and add extra values like loading='lazy' programmatically. Also, until the CSS aspect-ratio property officially lands, I still need to wrap <iframes> in a <div> and use the padded box trick to maintain a responsive aspect ratio.
Like remark, rehype only recognizes a handful of default types. Also like remark, custom types can be created, but I found it was still easier to visit the default HTML raw nodes and use RegEx to filter out the ones I wanted.
The RegEx matcher I used looks like this:
new RegExp(/<iframe(.*)<\/iframe>/g)And the matching AST node looks roughly like this:
{
  type: 'raw',
  value: '<iframe>...</iframe>'
}
A downside to working directly with the raw node type is there is no concept similar to hProperties. The only information the node has is its string literal value, so any HTML attributes will need to be filtered out of that string with RegEx. I made a helper function that would take a source string and attribute name and fish them out.
function transformer(tree) {
  visit(tree, 'raw', visitor)
  function visitor(node) {
    const iframeRegex = new RegExp(/<iframe(.*)<\/iframe>/g)

    if (node.value && node.value.match(iframeRegex)) {
      const value = node.value.match(iframeRegex)[0]
      const title = fishAttr(value, 'title')
      const src = fishAttr(value, 'src')
      const aspectRatio = fishAttr(value, 'data-aspect-ratio')

      const newValue = `<div class="embed" data-aspect-ratio="${aspectRatio}">
        <iframe src="${src}" title="${title}" loading="lazy"></iframe>
      </div>`

      node.value = node.value.replace(iframeRegex, newValue)
    }
  }
}

function embed() {
  return transformer
}

export default embed
Another difference between rehype and remark is that only the node’s value property matters, so we can actually use String.replace() instead of Object.assign. This does as little modification as possible to the HAST tree and can prevent unintentionally assigning over important values, like whitespace, that the RegEx matcher may have accidentally grabbed.
<iframe
  src='https://ryan-responsive-iframe.netlify.com/'
  title='wide screen'
  data-aspect-ratio="16/9"
></iframe><div class="embed" data-aspect-ratio="16/9">
<iframe
src="https://ryan-responsive-iframe.netlify.com/"
title="wide screen"
loading="lazy"
></iframe>
</div>See the full code for the plugin on GitHub.
Doing Work Asynchronously
Since these plugins are just node functions, they have the ability to fetch out to other sources and get dynamic data at build time. An issue with this workflow is that the visit method provided by unist-util-visit is not an async function and cannot be used with the await keyword.
For this particular plugin, I wanted to take the Twitter provided HTML embed code, strip off the <script> tag that would load the JavaScript from Twitter, and instead use rehype to format the HTML in a way I could style myself. I used the same strategy as matching <iframe> elements, but looked for <blockquote>s that had a class of "twitter-tweet".
new RegExp(/<blockquote class="twitter-tweet">(.*)<\/blockquote>/)And the matching AST node looks roughly like this:
{
  type: 'raw',
  value: '<blockquote class="twitter-tweet">...</iframe>'
}
To build my own Twitter component, I needed the url of a user’s avatar from the Twitter website. If fetch visits Twitter’s regular homepage and cannot load client side JavaScript Libraries it will triggers the “you need to load React” warning screen. The only way (that I could think of, anyways) to get a parsable page that contains an avatar url is to fetch against mobile.twitter.com.
Transforming the HTML from the Twitter blockquote works almost exactly the same as the embed plugin. I used my fishAttr function to get values from the original markup and then plug them into a string literal template. The difference is that instead of using String.replace() to create new markup, I created a render() function that could be called inside of a Promise and passed the returned url for the avatar.
const twitter = () => async (tree) => {
  const createTweet = node => {
    const tweetRegex = new RegExp(/<blockquote class="twitter-tweet">(.*)<\/blockquote>/)

    if (node.value && node.value.match(tweetRegex)) {
      const value = node.value.match(tweetRegex)[0]

      const render = avatarUrl => (`
        <div class="twitter-tweet">
          // new markup here
        </div>
      `)
    }
  }

  visit(tree, 'raw', createTweet)
}

export default twitter
As I previously mentioned, visit can’t be used directly with async/await. Instead, the createTweet method passed to visit needs to await the result of the fetch Promise. This can be done by storing that Promise inside of a variable and pushing it to an array of pending Promises. Then, using Promise.all, we can make sure everything pushed to that array is done before the final return from the plugin happens.
const twitter = () => async (tree) => {

  const promises = []

  const createTweet = node => {
    const tweetRegex = new RegExp(/<blockquote class="twitter-tweet">(.*)<\/blockquote>/)

    if (node.value && node.value.match(tweetRegex)) {
      const value = node.value.match(tweetRegex)[0]
      const user = value.match(/—(.*)\)/)[0]
      const handle = user.match(/\((.*)\)/)[1]
      const name = user.match(/— (.*) \(/)[1]

      const render = avatarUrl => { ... }

      const promise = fetch(`https://mobile.twitter.com/${handle}`)
        .then(response => response.text())
        .then(html => {
          const imageUrlRegex = new RegExp(`<img alt="${name}" src="(.*)" \/>`)
          const imageUrlMatch = html.match(imageUrlRegex)
          return imageUrlMatch[1]
        })
        .then(avatarUrl => {
          const newNodeValue = render(avatarUrl)
          return node.value = node.value.replace(tweetRegex, newNodeValue)
        })
        .catch(() => {})

      promises.push(promise)
    }
  }

  visit(tree, 'raw', createTweet)
  await Promise.all(promises)

  return
}

export default twitter
A nice thing about rehype plugins is that if they return an error, they do not transform the node and move on. If, for whatever reason, the plugin gets into the .catch() block of the fetch Promise, the original blockquote will still exist as it originally was in the AST tree.
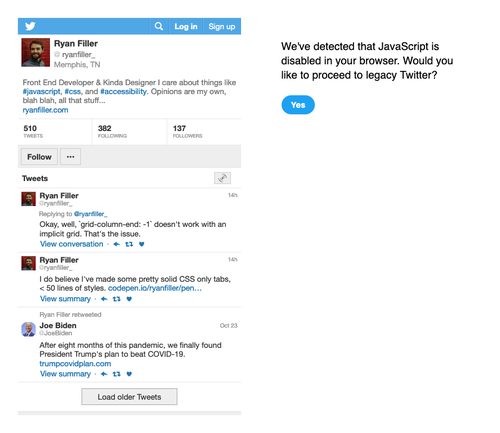
<blockquote class="twitter-tweet">
  <p lang="en" dir="ltr">
    I need to make a tweet embed component for my blog.
  </p>
  — Ryan Filler (@ryanfiller_)
  <a href="https://twitter.com/ryanfiller_/status/1259280535421140998?ref_src=twsrc%5Etfw">
    May 10, 2020
  </a>
</blockquote><div class="twitter-tweet">
<div >
<a href="https://twitter.com/ryanfiller_" title="RyanFiller" >
<img
alt="Ryan Filler"
src="https://pbs.twimg.com/profile_images/1038060989147766784/8P25vCc6_normal.jpg"
>
</a>
<div>
<a href="https://twitter.com/ryanfiller_">
Ryan Filler
</a>
<a href="https://twitter.com/ryanfiller_">
@ryanfiller_
</a>
</div>
<a
href="https://twitter.com/ryanfiller_/status/1259280535421140998?ref_src=twsrc%5Etfw"
title="View on Twitter"
>
<svg>...</svg>
</a>
</div>
<div >
I need to make a tweet embed component for my blog.
</div>
<div >
<span >
May 10, 2020
</span>
<a href="/uses/#embedded-tweets">
<svg>...</svg>
</a>
</div>
</div>
See the full code for the plugin on GitHub.
Huge thank you to Chris Biscardi for being available in the Party Corgi Discord group and pointing me to this async example, again by Jason Lengstorf.
Using the Plugins
I’ve found two situations to use these plugins on my own site — to pass to a build tool to create pages, or to call from the unified method directly for RSS.
For compiling pages, an array of plugins can be passed as part of the configuration object to both MDX (and its Gatsby implementation) and MDsveX.
plugins = [
  {
    resolve: 'gatsby-plugin-mdx',
    options: {
      extensions: ['.md'],
      remarkPlugins: [
        require(`remark-attr`),
        require(`${__dirname}/plugins/remark/blockquote`),
        require(`${__dirname}/plugins/remark/headings`),
        require(`${__dirname}/plugins/remark/images`),
        require(`${__dirname}/plugins/remark/links`),
      ],
      rehypePlugins: [
        require(`${__dirname}/plugins/rehype/embed`),
        require(`${__dirname}/plugins/rehype/twitter`)
      ],
    }
  }
]svelte({
mdsvex({
extension: '.md',
remarkPlugins: [
[attr, { scope: 'every' }],
blockquote,
headings,
images,
links,
],
rehypePlugins: [
embed,
twitter
]
})
})The entire purpose of this refactor was to make my content more portable. The best part of this is that these plugins can be run outside of a framework. Like any other remark or rehype plugins, they can also be called as chained methods from the parent unified function. I use this in a helper method to create json and rss endpoints of my content.
unified()
    .use(remarkParse)
    // use remark plugins here
    .use(remarkStringify)
    .use(remarkToRehype)
    // use rehype plugins here
    .use(rehypeStringify)
    .process(file, (err, file) => {
      // ...
    })
Plugins will need to run at certain points during the transformation life cycle, and going from a markdown file to a final HTML document requires a particular set of parse and stringify functions depending on the data.
For now, these plugins only live in a directory in my project. If your project could benefit from similar transformations, feel free to copy and paste them into your own project or reach out on Twitter and let me know — I can look into abstracting these and open sourcing them on NPM.